Introduction

  1. ZWtkYJt6hZsLnXSv
    ZWtkYJt6hZsLnXSv
    nkLBGlDwTTTshnWO
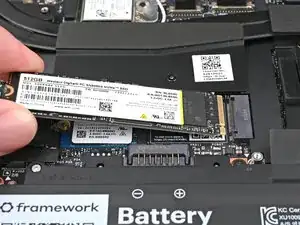
    • Use your Framework Screwdriver to remove the 2 mm‑long T5 Torx screw securing the SSD.

    • The SSD might pop up at a shallow angle when you remove the screw.

  2. fBglwHIawfiZCiD1
    fBglwHIawfiZCiD1
    TefZLVntyHNNMsJS
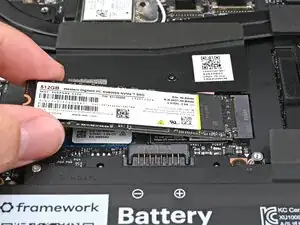
    • Grip the end of the SSD with the screw hole and slide it out of its socket.

    • Remove the SSD.

Conclusion

To reassemble your device, follow these instructions in reverse order.

Take your e-waste to an R2 or e-Stewards certified recycler.

Repair didn’t go as planned? Try some basic troubleshooting, or ask our Answers Community for help.

Alex Diaz-Kokaisl

Member since: 16/01/22

215075 Reputation

0 comments